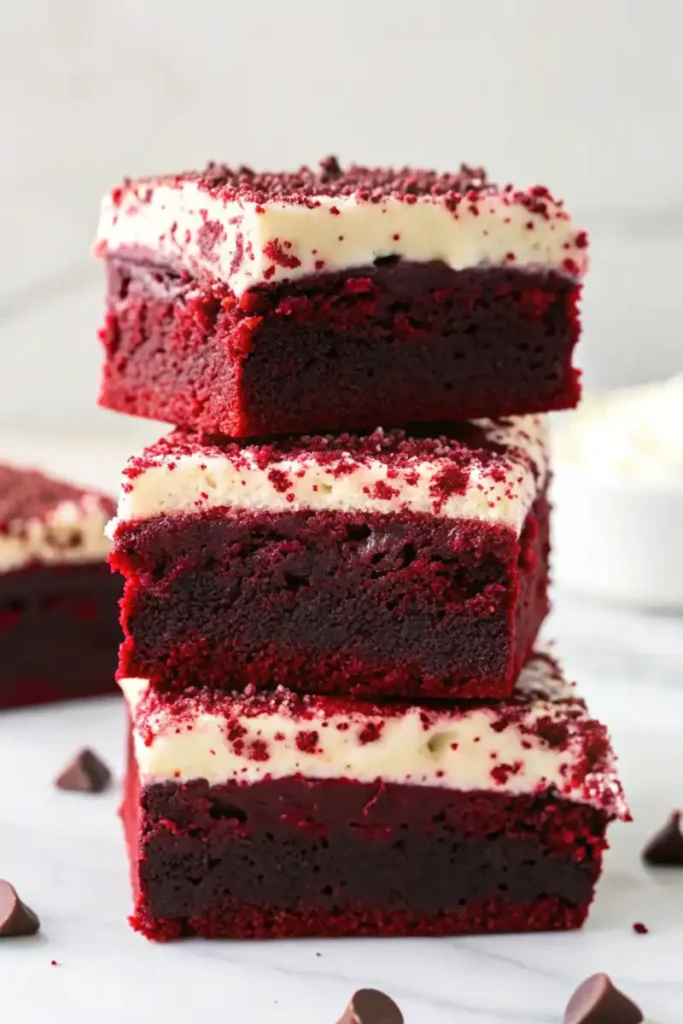
Who doesn’t love the combination of rich chocolatey flavors and the striking red hue of red velvet brownies? These moist, fudgy, and utterly irresistible treats are perfect for any occasion. Whether you’re baking for a birthday, a holiday, or just to satisfy your sweet tooth, this recipe will be your go-to. Let’s dive into why these homemade brownies deserve a special place in your kitchen.
JUMP TO
- Why Red Velvet Brownies Are Irresistible
- The Health Benefits of Homemade Brownies
- Key Ingredients for Red Velvet Brownies
- How to Make Red Velvet Brownies
- Variations of Red Velvet Brownies
- Tips and Tricks for Perfect Red Velvet Brownies
- Freezing and Storing Red Velvet Brownies
- Serving Ideas and Pairings
- Conclusion: Why You’ll Fall in Love with Red Velvet Brownies
- Frequently Asked Questions About Red Velvet Brownies
Why Red Velvet Brownies Are Irresistible
A Perfect Blend of Chocolate and Vanilla
Red velvet brownies bring together the best of two worlds. The subtle chocolate flavor, enhanced with just the right hint of vanilla, creates a harmonious balance that’s not too sweet and not too rich. This makes them a crowd-pleaser for both kids and adults. Unlike other desserts, these brownies offer a distinctive velvety texture that sets them apart.
The Appeal of the Red Velvet Color
Let’s talk about that striking red hue! It’s not just about looks—this vibrant color makes these brownies feel extra special and festive. Perfect for Valentine’s Day, or even a bake sale, the visual charm adds to their overall allure. Plus, if you’re looking for a natural option, you can use beetroot juice for coloring instead of artificial dyes.
Versatile for Every Occasion
Whether it’s a family gathering, a gift for a friend, or a treat for yourself, red velvet brownies fit the bill. Their ability to adapt to themes and decorations makes them a hit at parties and celebrations. You can even dress them up with cream cheese frosting for an elegant twist.
Easy to Make, Even for Beginners
If you’ve ever been intimidated by baking, fear not! This recipe is straightforward and uses simple ingredients you probably already have in your pantry. With a few pro tips (which we’ll cover later), you’ll master the art of baking brownies that taste like they came from a professional bakery.
The Health Benefits of Homemade Brownies
Why Homemade Is Better
Making red velvet brownies from scratch has plenty of perks! Unlike store-bought desserts, homemade brownies let you control every ingredient, ensuring a treat that fits your dietary needs and preferences. For instance, you can adjust the sugar level to make them less sweet or use alternative flours for a healthier twist. And, hey, fewer preservatives? That’s always a win.
Control Over Ingredients
One of the best things about baking at home is knowing exactly what’s in your food. You can swap refined sugar for coconut sugar, use whole wheat flour instead of all-purpose, or opt for natural food coloring to achieve that classic red hue. Want to make it dairy-free? No problem. The possibilities are endless when you’re in charge.
Fewer Preservatives and Additives
Store-bought desserts often come with a long list of unpronounceable additives. By baking your own red velvet brownies, you sidestep those unnecessary extras and focus on fresh, wholesome ingredients. This way, you can enjoy your dessert guilt-free.
Options for Healthier Variations
If you’re looking to boost the nutritional value of your brownies, homemade is the way to go. Add finely grated beetroot for a natural color boost and an extra dose of fiber. Alternatively, throw in some chopped nuts for healthy fats or use almond flour for a gluten-free version. These simple tweaks make your homemade brownies both indulgent and nutritious.
For more ways to make healthier desserts, check out Protein Brownies Recipe for inspiration! These ideas can help you turn even the most indulgent treats into something a little better for you.
Key Ingredients for Red Velvet Brownies
Core Ingredients
Red velvet brownies are made with a few simple yet powerful components that combine to create their signature taste, texture, and vibrant appearance. Here’s a detailed breakdown of the essential ingredients you’ll need for this decadent dessert:
Detailed List of Ingredients
- Unsalted Butter (1/2 cup)
Provides richness and helps achieve the moist, fudgy texture that makes these brownies irresistible. - Granulated Sugar (1 cup)
Sweetens the batter and ensures a balanced flavor profile. - Brown Sugar (1/4 cup)
Adds a hint of molasses for depth and chewiness. - Large Eggs (2)
Bind the ingredients together and give structure to the brownies. - Vanilla Extract (1 teaspoon)
Enhances the flavor, complementing the cocoa and buttermilk beautifully. - Unsweetened Cocoa Powder (2 tablespoons)
Delivers a subtle chocolate note that pairs perfectly with the other flavors. - All-Purpose Flour (3/4 cup)
The base of the batter, creating the perfect balance between cakey and fudgy textures. - Buttermilk (1/4 cup)
Adds a slight tang and moisture, essential for the classic red velvet flavor. - Red Food Coloring (1-2 teaspoons)
Gives the brownies their signature deep red hue. Feel free to use natural alternatives like beet powder or pomegranate juice. - Salt (1/4 teaspoon)
Balances the sweetness and enhances the other flavors. - Baking Powder (1/2 teaspoon)
Aids in slight leavening for a soft texture. - Optional: Cream Cheese (4 ounces)
Perfect for making a swirl or as frosting for added richness.
These ingredients are not only pantry-friendly but also adaptable, allowing you to customize based on your preferences or dietary needs. For substitutions, refer to this helpful guide: Substitutes for Heavy Cream.
How to Make Red Velvet Brownies
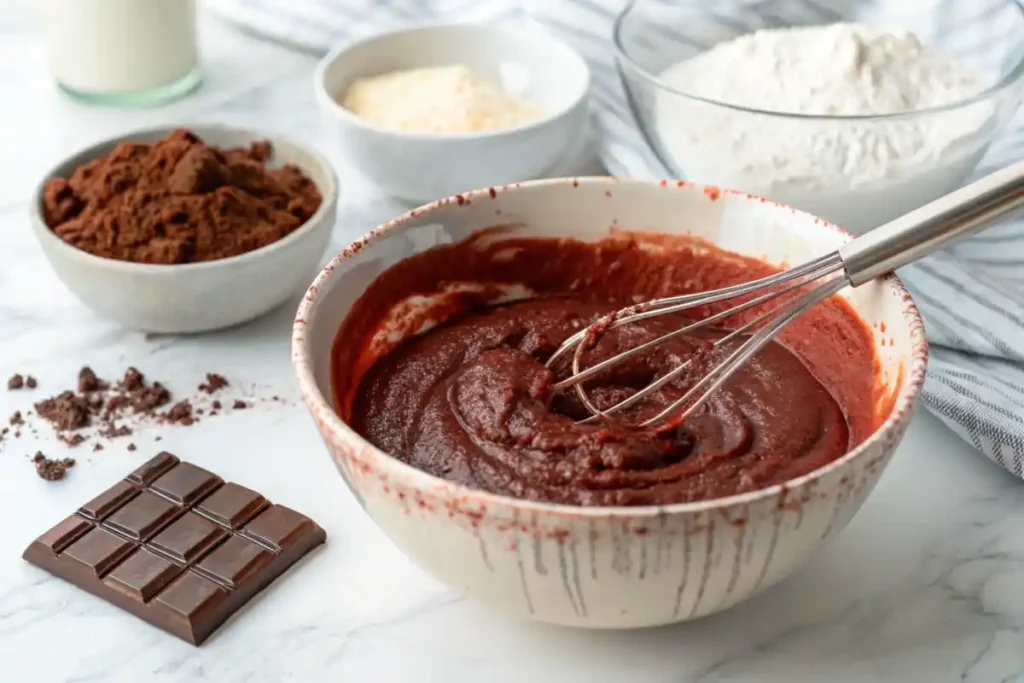
Making red velvet brownies is easier than you might think! With a few simple steps, you’ll have a batch of rich, moist, and eye-catching treats ready to enjoy. Here’s a detailed guide to help you bake these brownies to perfection.
Prepping Your Ingredients and Tools
- Preheat the Oven: Set your oven to 350°F (175°C). Grease an 8×8-inch baking pan or line it with parchment paper for easy removal.
- Prepare the Ingredients: Measure and set out all ingredients. Ensure the butter and eggs are at room temperature for better mixing.
Mixing the Wet and Dry Ingredients
- Melt the Butter: In a large microwave-safe bowl, melt the butter and let it cool slightly. Stir in the granulated sugar and brown sugar until fully combined.
- Add the Eggs and Vanilla: Beat in the eggs one at a time, followed by the vanilla extract, ensuring a smooth mixture.
- Incorporate Cocoa and Food Coloring: Stir in the cocoa powder and red food coloring until the batter reaches your desired shade of red.
- Combine Dry Ingredients: In a separate bowl, whisk together the flour, salt, and baking powder. Gradually fold this dry mixture into the wet ingredients, alternating with the buttermilk to maintain a smooth consistency.
Baking to Perfection
- Pour the Batter: Transfer the batter into the prepared baking pan, spreading it evenly with a spatula.
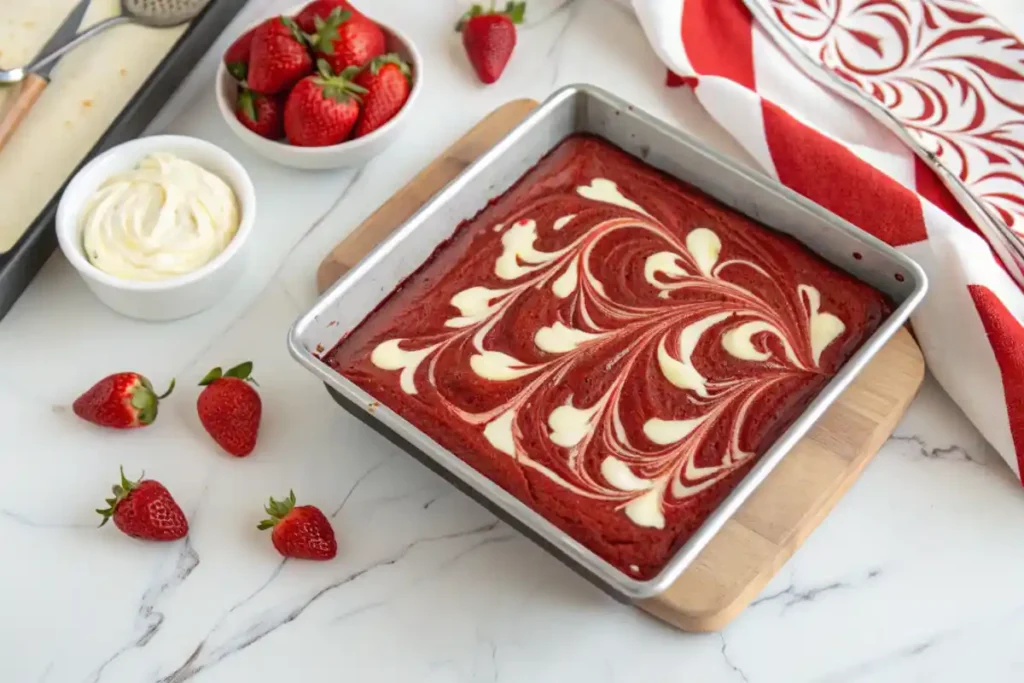
- Add Optional Swirls or Toppings: If using cream cheese, drop small dollops on top and swirl it into the batter using a knife for a marbled effect.
- Bake: Place the pan in the preheated oven and bake for 25–30 minutes. To check for doneness, insert a toothpick into the center—it should come out with moist crumbs, not wet batter.
Cooling and Adding Toppings
- Cool Completely: Let the brownies cool in the pan for about 15 minutes, then transfer them to a wire rack.
- Optional Frosting: If you’re feeling fancy, spread cream cheese frosting over the cooled brownies for an extra layer of indulgence.
- Slice and Serve: Cut into squares or rectangles and serve. Pair with a cold glass of milk or enjoy as-is!
Pro Tip: Avoid overmixing the batter to ensure the perfect fudgy texture. For more baking tips, explore Sourdough Brownies Recipe for another unique twist on brownies.
Variations of Red Velvet Brownies
Fun and Delicious Variations
The beauty of red velvet brownies is how easily they can be customized. Whether you’re catering to dietary needs or simply looking to mix things up, there’s a variation for everyone. Let’s explore some exciting ways to give these classic brownies a fun twist.
Red Velvet Cheesecake Brownies
Add a luxurious cheesecake layer for a creamy, tangy contrast to the rich cocoa flavor. To make, whip together cream cheese, sugar, and an egg, then swirl the mixture into the brownie batter before baking. The result? A stunning marbled dessert that’s both decadent and eye-catching.
Gluten-Free Red Velvet Brownies
Swap the all-purpose flour for almond flour or a gluten-free flour blend. These alternatives work beautifully, ensuring that everyone, including those with gluten sensitivities, can indulge in these fudgy delights.
Vegan Red Velvet Brownies
Ditch the dairy and eggs by using plant-based alternatives. Applesauce or mashed bananas can replace eggs, while vegan butter or coconut oil substitutes the dairy. Opt for natural red coloring like beet powder for a completely plant-based treat.
Adding White Chocolate Chips or Nuts
For an added crunch or creamy burst of flavor, fold in white chocolate chips, chopped pecans, or walnuts into the batter. These add-ins not only enhance the texture but also complement the sweetness of the brownies beautifully.
Tips and Tricks for Perfect Red Velvet Brownies
Baking Secrets You Need to Know
Making the perfect red velvet brownies doesn’t have to be tricky. These tips and tricks will help ensure your brownies turn out rich, moist, and absolutely delectable every time you bake them.
Getting the Perfect Texture
- Don’t Overmix the Batter: Once you add the dry ingredients, gently fold them in. Overmixing can lead to tough, cakey brownies instead of the desired fudgy texture.
- Check for Doneness Early: Use the toothpick test, but remember you want a few moist crumbs to stick. Overbaking dries out the brownies, so keep a close eye on the timer.
Avoiding Common Mistakes
- Use High-Quality Ingredients: Opt for premium cocoa powder and pure vanilla extract. These small upgrades make a huge difference in flavor.
- Room Temperature Ingredients: Ensure the butter and eggs are at room temperature for smoother mixing and a more uniform batter.
- Measure Accurately: Baking is a science, so use measuring cups and spoons for precise ingredient portions.
Storage Tips for Freshness
- Keep Them Airtight: Store your cooled brownies in an airtight container at room temperature for up to three days. This prevents them from drying out.
- Refrigeration for Longer Shelf Life: If you’ve added cream cheese frosting, refrigerate the brownies in an airtight container for up to a week. Let them come to room temperature before serving for the best texture.
Freezing and Storing Red Velvet Brownies
How to Preserve Your Brownies
If you’ve made a big batch of red velvet brownies (lucky you!), proper storage is key to maintaining their moist, fudgy texture. Whether you’re saving them for later or prepping for an event, these tips will help keep your brownies fresh and delicious.
The Best Way to Freeze Brownies
- Pre-Slice Before Freezing: Cut your cooled brownies into individual portions. This makes it easier to grab just the amount you need without thawing the entire batch.
- Wrap Individually: Wrap each brownie tightly in plastic wrap to prevent freezer burn and preserve freshness.
- Store in a Freezer Bag: Place the wrapped pieces in a freezer-safe zip-top bag or airtight container. Label it with the date for easy reference.
Thawing Tips for the Perfect Texture
- Room Temperature Thawing: Remove the desired number of brownies from the freezer and unwrap them. Let them thaw at room temperature for about 30 minutes.
- Microwave for Quick Thawing: If you’re in a hurry, unwrap the brownie and microwave it for 15-20 seconds. This method also warms it up slightly, making it taste fresh out of the oven!
Extended Storage Tips
- Room Temperature: Store brownies in an airtight container at room temperature for 2-3 days. Add a slice of bread to the container to help retain moisture.
- Refrigeration: If your brownies have cream cheese frosting, keep them refrigerated in a sealed container for up to a week.
Pro Tip: To elevate thawed brownies, drizzle them with a touch of cream cheese frosting or melted white chocolate. They’ll taste like they were baked the same day! For more make-ahead dessert ideas, explore the No-Bake Pumpkin Pie for another treat that stores beautifully.
Serving Ideas and Pairings
Delicious Ways to Enjoy Your Brownies
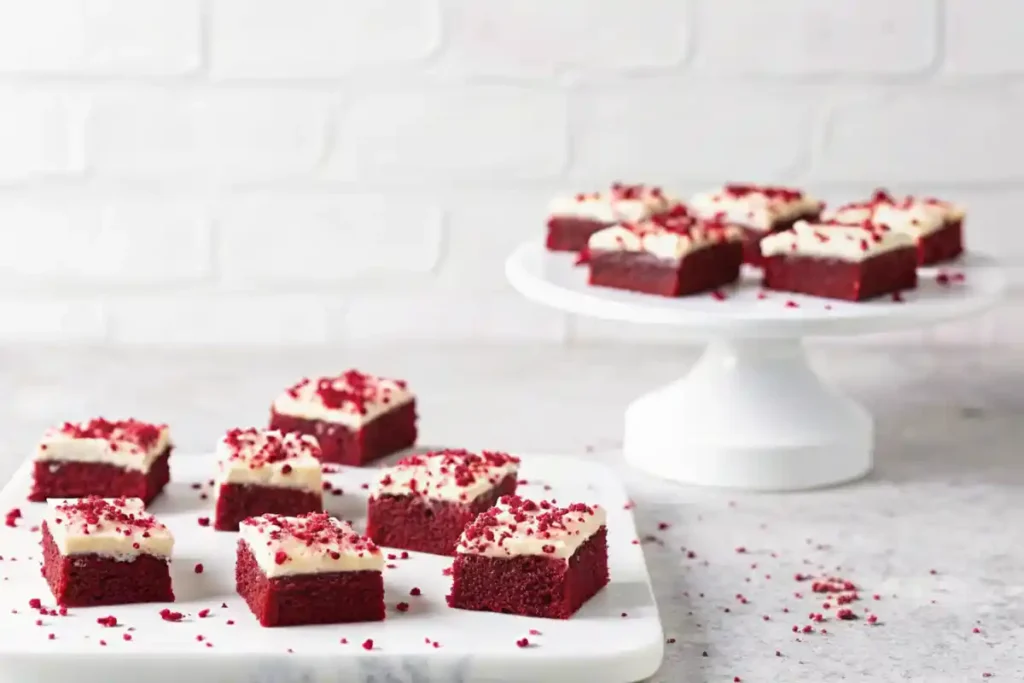
Red velvet brownies are fantastic on their own, but why not elevate your dessert game with some creative serving ideas? These pairings and toppings will take your brownies from simple to spectacular.
Pair with Ice Cream or Coffee
- Ice Cream Delight: Serve a warm brownie with a scoop of vanilla or cream cheese-flavored ice cream for a classic and indulgent treat. The contrast between the warm brownie and cold ice cream is simply irresistible.
- Perfect Coffee Companion: Red velvet’s subtle cocoa flavor pairs beautifully with a steaming cup of coffee or a creamy latte. The combination is ideal for brunch or an afternoon pick-me-up.
Add Fresh Berries or Whipped Cream
- Berry Bliss: Garnish your brownies with fresh raspberries, strawberries, or blueberries for a burst of fruity freshness. The tartness of the berries complements the richness of the brownies perfectly.
- Whipped Cream Magic: A dollop of homemade whipped cream on top adds lightness and elegance, making the brownies feel like a restaurant-worthy dessert.
Creative Presentation Ideas
- Layered Dessert Parfait: Crumble brownies into a glass and layer with cream cheese frosting or whipped cream and fresh berries for a stunning parfait.
- Brownie Bites: Cut the brownies into small squares, insert toothpicks, and serve as bite-sized treats at parties or gatherings.
Conclusion: Why You’ll Fall in Love with Red Velvet Brownies
Red velvet brownies are more than just a dessert; they’re a delightful experience for your taste buds. From their vibrant red hue to their perfectly balanced flavors of cocoa and vanilla, these brownies are a treat for both the eyes and the palate. Whether you enjoy them plain, with a cream cheese swirl, or topped with whipped cream, they’re sure to impress.
Ready to give this recipe a try? Gather your ingredients, follow our step-by-step guide, and let your kitchen fill with the delicious aroma of fresh-baked brownies. Don’t forget to share your creations with family and friends—or keep them all to yourself, we won’t judge!
Happy baking!
Frequently Asked Questions About Red Velvet Brownies
What’s the difference between chocolate cake and red velvet cake?
While both cakes contain cocoa powder, the main difference lies in the balance of ingredients and flavor. Red velvet cake uses a smaller amount of cocoa powder, combined with buttermilk and vinegar, which adds a subtle tanginess and a smoother texture. Chocolate cake, on the other hand, has a more pronounced cocoa flavor and does not include the acidic components that give red velvet its distinct taste.
What makes brownies too gooey?
Brownies can become too gooey if there’s too much fat (like butter or oil) or sugar in the batter. Underbaking is another common reason. To fix this, ensure you measure your ingredients accurately and bake until a toothpick inserted in the center comes out with moist crumbs—not wet batter. Also, letting the brownies cool fully can help them set properly.
What makes red velvet cake taste so good?
The unique combination of cocoa, vanilla, and buttermilk gives red velvet cake its iconic flavor. The slight tang from the vinegar or buttermilk balances the sweetness, while the cocoa provides subtle chocolate undertones. It’s this carefully balanced flavor profile that makes red velvet desserts so irresistible.
Is red velvet just dyed chocolate?
Not exactly! While red velvet recipes do contain cocoa powder, they use a much smaller amount compared to chocolate-based desserts. The distinct flavor of red velvet comes from the combination of cocoa, buttermilk, and vinegar, not just from the red dye. The dye is primarily for aesthetic appeal and doesn’t influence the taste significantly.
Latest Recipes to Inspire Your Next Meal
