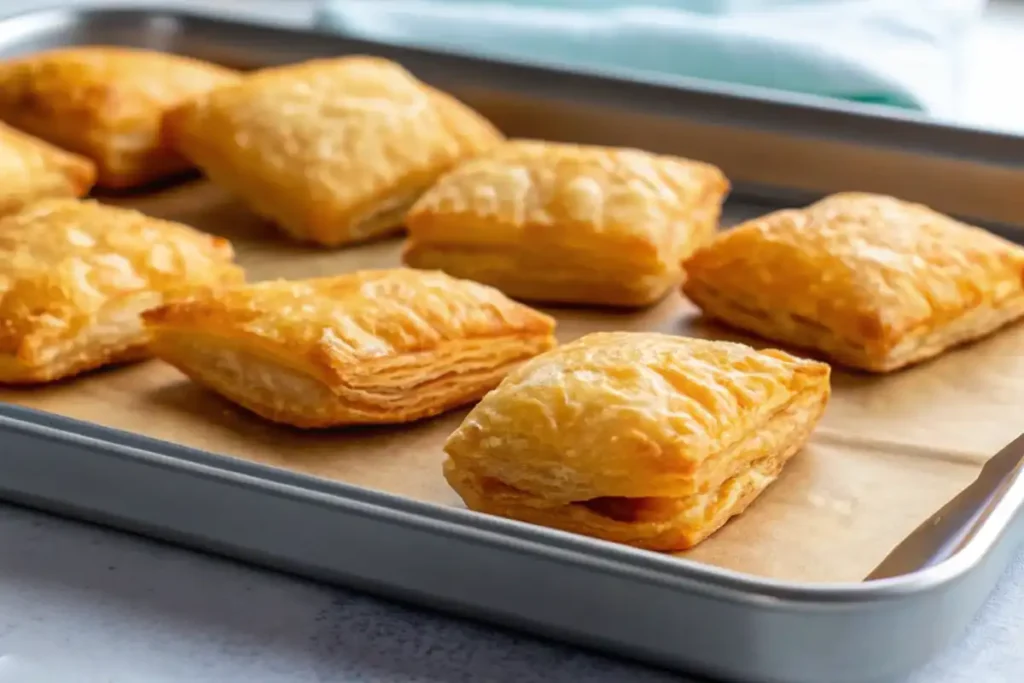
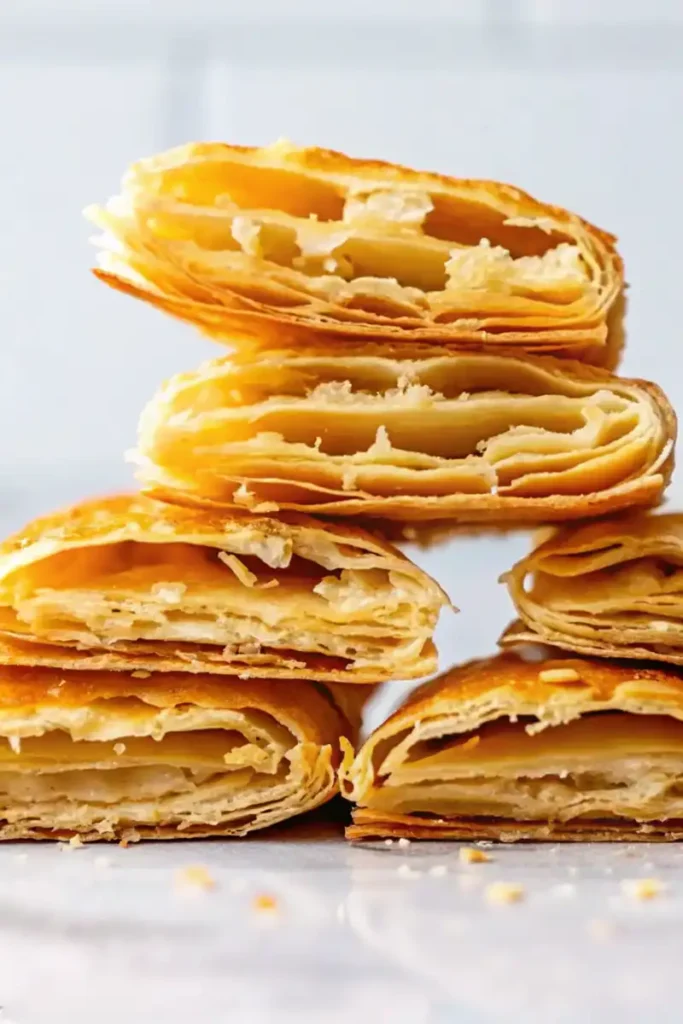
Imagine biting into a buttery, flaky pastry that melts in your mouth—sounds amazing, right? Now, picture it being completely gluten-free! For anyone with gluten sensitivities or simply looking to explore new baking adventures, gluten-free puff pastry is a game-changer. It’s versatile, delicious, and surprisingly easy to make with a little guidance. In this article, you’ll learn everything you need to know, from why it’s worth making to pro tips for perfecting your puff pastry skills. Let’s get baking!
JUMP TO
- Why You’ll Love Gluten-Free Puff Pastry
- Health Benefits of Gluten-Free Puff Pastry
- Ingredients for Gluten-Free Puff Pastry
- How to Make Gluten-Free Puff Pastry
- Gluten-Free Puff Pastry Tips and Tricks
- Using Gluten-Free Puff Pastry in Recipes
- Storage and Freezing Instructions
- Conclusion
- Frequently Asked Questions (FAQs)
Why You’ll Love Gluten-Free Puff Pastry
Making gluten-free puff pastry might seem like a daunting task, but trust me, it’s a game-changer for anyone craving a flaky, buttery pastry without gluten. Whether you’re preparing a savory pie or a No-Bake Pumpkin Pie, this recipe opens the door to endless possibilities. Plus, when you make it at home, you can tweak every detail to suit your needs—talk about a win-win!
What Makes Gluten-Free Puff Pastry Unique?
Let’s get real for a second. Traditional puff pastry relies heavily on gluten to create those famous flaky layers, but guess what? You don’t need gluten to achieve that dreamy texture. The magic lies in proper folding techniques and the right combination of gluten-free flours. You can use rice flour, almond flour or oat flour as a base, paired with a binding agent like xanthan gum to mimic elasticity.
Benefits of Making It at Home
Sure, you could grab a pre-made gluten-free puff pastry from the store. But let’s face it—they’re pricey and not always allergen-friendly. When you whip it up in your own kitchen, you control what goes into the dough. Plus, there’s something so satisfying about creating those flaky layers from scratch, right?
Not only will you avoid unwanted additives, but homemade puff pastry also tastes fresher and works better in recipes. You can even customize it with ingredients like herbs for savory dishes or cinnamon for a sweet twist.
Health Benefits of Gluten-Free Puff Pastry
Switching to gluten-free puff pastry isn’t just about addressing gluten sensitivities—it can be a step toward healthier, more mindful eating. Whether you’re living with celiac disease, managing gluten intolerance, or simply exploring cleaner ingredient options, this pastry proves that indulgence and wellness can go hand in hand.
Who Benefits From Gluten-Free Diets?
A gluten-free diet can be life-changing for individuals with celiac disease or gluten sensitivity. Even if you don’t have a medical condition, reducing gluten might help alleviate issues like bloating or fatigue. For many, ditching gluten isn’t a restriction—it’s a chance to feel better every day without sacrificing flavor.
For example, this puff pastry pairs perfectly with recipes like the French Apple Pie for a satisfying yet tummy-friendly dessert.
Nutritional Value of Gluten-Free Ingredients
What sets gluten-free puff pastry apart nutritionally? Many gluten-free flours, like almond or oat flour, are higher in protein and fiber compared to traditional wheat flour. These nutrients can help you stay full longer and support digestive health. Plus, binding agents like psyllium husk or flaxseed bring their own health benefits, such as improved gut health and added omega-3s.
Making your pastry at home also lets you avoid the preservatives and additives often found in pre-made options, giving you a cleaner, more wholesome treat. Healthier indulgence? Yes, please!

Ingredients for Gluten-Free Puff Pastry
Core Ingredients
- Gluten-Free Flour Blend – 2 ½ cups (300g)
- A mix of rice flour, tapioca starch, and potato starch works well.
- Alternatively, use a store-bought gluten-free flour blend designed for baking.
- Unsalted Butter (or Dairy-Free Alternative) – 1 cup (225g), chilled and cubed
- For best results, use high-fat butter that’s cold but pliable.
- For dairy-free versions, use plant-based butter or margarine with a firm texture.
- Xanthan Gum or Psyllium Husk – 1 teaspoon
- A binding agent to mimic gluten’s elasticity and hold the dough together.
- Salt – ½ teaspoon
- Enhances flavor and balances the richness of the butter.
- Ice-Cold Water – ¾ cup (180ml)
- Keeps the dough pliable without melting the butter during mixing and folding.
Optional Additions for Customization
- Granulated Sugar – 1 tablespoon (optional)
- For sweeter puff pastry recipes like fruit tarts or cream horns.
- Dried Herbs or Spices – 1 teaspoon (optional)
- Examples: rosemary, thyme, or garlic powder for savory recipes.
- Egg Wash – 1 egg, beaten with 1 tablespoon of water (optional)
- Adds a glossy, golden finish to your baked puff pastry.
- Milk or Cream (Dairy-Free Option Available) – 1 tablespoon
- Use for brushing the pastry in place of an egg wash.
Ingredient Notes
- If using a pre-mixed gluten-free flour blend, ensure it includes xanthan gum. If not, add it separately.
- Opt for high-quality butter or a reliable dairy-free substitute to achieve those signature flaky layers.
- Ice-cold water is crucial! Warm water will melt the butter and ruin the texture of your pastry.
How to Make Gluten-Free Puff Pastry
Ready to bring your gluten-free puff pastry to life? With the right approach, you can achieve perfectly flaky layers and buttery goodness. Let’s break it down into easy-to-follow steps that guarantee success. Roll up your sleeves—it’s time to bake!
1. Prepare the Dough Base
- In a large mixing bowl, combine 2 ½ cups of gluten-free flour blend, 1 teaspoon of xanthan gum, and ½ teaspoon of salt.
- Cut 4 tablespoons of cold butter into the dry mixture using a pastry cutter or your fingers until it resembles coarse crumbs.
- Gradually add ¾ cup of ice-cold water, stirring gently until the dough just comes together. Avoid overmixing, as this can make the pastry tough.
2. Chill the Dough
- Form the dough into a disc, wrap it in plastic wrap, and refrigerate for at least 30 minutes. This allows the butter to firm up and the dough to relax for easier rolling.
3. Prepare the Butter Block
- Take the remaining ¾ cup of butter (or a dairy-free substitute) and shape it into a 6×6-inch square between two sheets of parchment paper.
- Chill the butter block in the fridge until firm but pliable, about 15-20 minutes.
4. Roll and Enclose the Butter
- On a floured surface, roll out the dough into a 12×12-inch square. Place the butter block in the center.
- Fold the corners of the dough over the butter to fully encase it, forming a neat package. Pinch the edges to seal.
5. Begin Laminating the Dough
- Roll the dough into a long rectangle (approximately 8×20 inches). Be gentle to avoid breaking the butter layers.
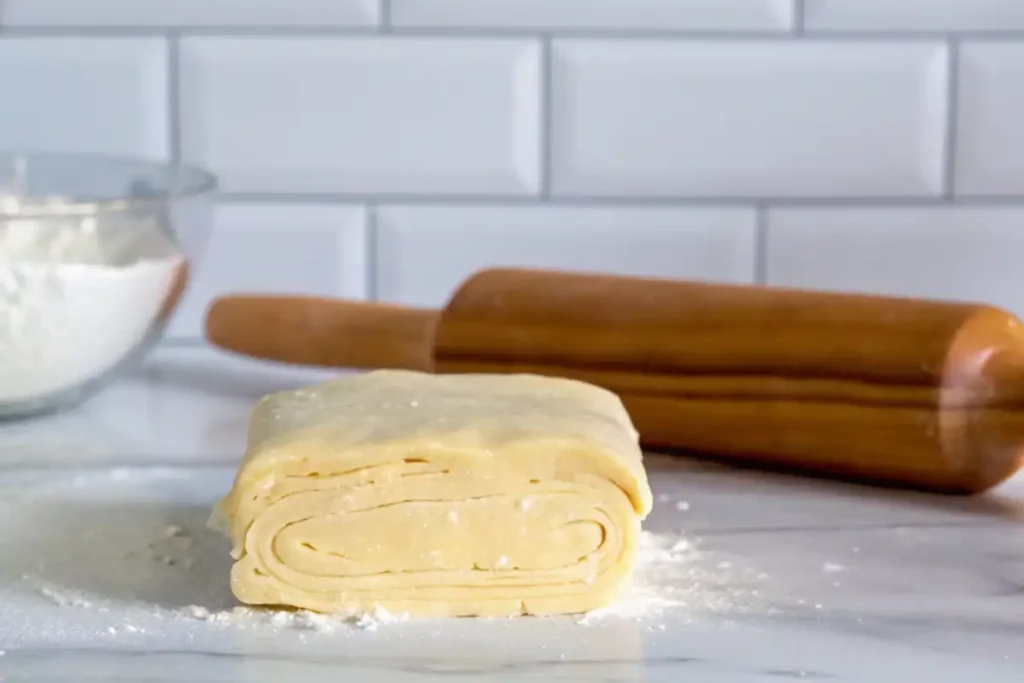
- Fold the dough into thirds, like folding a letter, and rotate it 90 degrees. This is your first “turn.”
- Wrap the dough in plastic wrap and refrigerate for 30 minutes.
6. Repeat Rolling and Folding
- Repeat the rolling, folding, and chilling process 4-6 more times. This creates the signature flaky layers. Remember to keep the dough and butter cold to prevent sticking.
7. Final Roll-Out and Shaping
- After the final chill, roll the dough to your desired thickness (about ¼ inch for most recipes). Use it immediately for your recipe or store it for later.
Tips for Success
- Always work quickly to keep the butter from melting into the dough.
- Use ice-cold water and chill between every step to maintain structure.
- For an ultra-flaky finish, brush the top with an egg wash before baking.

Gluten-Free Puff Pastry Tips and Tricks
Secrets for Perfect Flakiness
- Keep Everything Cold: Cold butter and chilled dough are essential for creating distinct layers. If the butter softens, it will mix into the dough and ruin the texture.
- Don’t Overwork the Dough: Handle the dough as little as possible to prevent it from becoming tough. Gentle folding is key!
- Use a Light Touch: When rolling, apply even, gentle pressure. This ensures the butter spreads evenly without breaking the layers.
Troubleshooting Common Issues
- Sticky Dough?
If the dough feels too sticky to work with, sprinkle more gluten-free flour onto your surface and rolling pin. Chill the dough briefly if necessary. - Dough Breaking Apart?
This can happen if the dough dries out. Lightly spritz the surface with water and knead gently to bring it back together. - Butter Leaking Out?
If butter starts to seep during rolling, your dough may be too warm. Stop, rewrap it in plastic, and chill for 15-20 minutes before continuing.
Pro Tips for Enhanced Flavor
- Add herbs like rosemary or thyme for savory recipes. For desserts, mix a little cinnamon or nutmeg into the flour blend for a warm, aromatic touch.
- If you’re aiming for extra indulgence, use European-style butter, which has a higher fat content and richer flavor.
Using Gluten-Free Puff Pastry in Recipes
Now that you’ve mastered the art of making gluten-free puff pastry, it’s time to explore its endless possibilities! Whether you’re craving something sweet, savory, or a creative twist, this versatile pastry is the perfect base for countless dishes.
Sweet Recipes with Gluten-Free Puff Pastry
Indulge your sweet tooth with these decadent dessert ideas:
- Fruit Tarts: Top puff pastry squares with fresh fruits and a dollop of cream for a simple, elegant dessert.
- Apple Turnovers: Fill pastry triangles with spiced apple filling, bake until golden, and enjoy a warm, flaky treat.
- Cream Horns: Roll the pastry into tubes, bake, and fill with sweetened whipped cream or custard.
Savory Recipes with Gluten-Free Puff Pastry
If savory is more your style, try these tempting options:
- Pot Pies: Use puff pastry as a flaky topping for individual or family-sized pot pies.
- Cheese and Herb Twists: Roll and twist strips of pastry with shredded cheese and herbs, then bake for a quick appetizer.
- Vegetable Tarts: Spread cream cheese or a dairy-free alternative on the pastry, layer with roasted veggies, and bake to golden perfection.
Creative Customizations
Make your puff pastry truly unique with these ideas:
- For Sweet Pastries: Add a sprinkle of sugar or cinnamon before baking.
- For Savory Pastries: Incorporate sesame seeds, poppy seeds, or grated Parmesan cheese for added flavor and crunch.
Cooking Tips for Recipes
- Preheat your oven to a high temperature (around 400°F/200°C) to ensure the pastry puffs beautifully.
- Use parchment paper or a silicone mat to prevent sticking and promote even browning.
- Chill filled pastries before baking to maintain sharp edges and crisp layers.
Storage and Freezing Instructions
One of the best things about gluten-free puff pastry is that it can be made ahead and stored for later use, saving you time in the kitchen. Proper storage ensures your hard work doesn’t go to waste and keeps your pastry ready for any culinary adventure.
How to Store Gluten-Free Puff Pastry
- In the Refrigerator: Wrap the pastry tightly in plastic wrap and place it in an airtight container. It will stay fresh in the fridge for up to 3 days.
- After Baking: If you’ve already baked the pastry, allow it to cool completely before storing it in an airtight container at room temperature for up to 2 days.
Freezing Tips for Long-Term Storage
Freezing gluten-free puff pastry is a great way to ensure you always have some on hand:
- For Raw Dough:
- Roll the dough into a flat sheet or shape it as needed, then place it between sheets of parchment paper.
- Wrap it tightly in plastic wrap and then foil to prevent freezer burn.
- Store it in the freezer for up to 2 months.
- For Baked Pastries:
- Cool them completely before wrapping individually in plastic wrap.
- Store in a freezer-safe container or bag for up to 1 month.
Thawing Instructions
- Raw Dough: Move it to the refrigerator and let it thaw slowly overnight. Avoid microwaving as it may compromise the texture.
- Baked Pastries: Reheat directly from frozen in an oven preheated to 350°F (175°C) for 10-15 minutes. This restores their crispiness and warmth.
Pro Tip for Freezing Success
Label your frozen dough or pastries with the date to track freshness. And don’t skip double-wrapping—it makes a huge difference in maintaining quality.
Conclusion
Gluten-free puff pastry is a game-changer, offering flaky, buttery goodness without the gluten. With the right ingredients, techniques, and storage tips, you can create a pastry that rivals the traditional version. Happy baking!
Frequently Asked Questions (FAQs)
Is Jus-Rol pastry gluten-free?
Yes, Jus-Rol offers a gluten-free puff pastry option that is widely available in stores. It’s made with a blend of gluten-free flours and is suitable for those with celiac disease or gluten sensitivities. Always check the label to ensure it meets your dietary needs.
What is the best substitute for puff pastry?
If puff pastry isn’t an option, you can use phyllo dough, pie crust, or even shortcrust pastry as substitutes, depending on the recipe. For gluten-free alternatives, consider using a blend of almond and oat flours to create a flaky crust similar to puff pastry.
Why did my gluten-free puff pastry not puff?
Gluten-free puff pastry may not puff properly if:
– The butter was too soft, causing it to blend with the dough.
– The dough wasn’t cold enough during folding and rolling.
– The oven wasn’t preheated to a high enough temperature (typically 400°F/200°C).
To fix this, chill your dough thoroughly between turns and ensure your oven is hot for the initial “puff” effect.
Which gluten-free flour is best for pastry?
The best gluten-free flours for pastry include rice flour, tapioca starch, and potato starch, often used in combination for the perfect texture. Pre-mixed gluten-free flour blends are also excellent, especially those designed specifically for baking, as they often include xanthan gum or other binders to mimic gluten’s properties.

