Making a heart-shaped cake is the ultimate way to show love and care—perfect for Valentine’s Day, anniversaries, or just because! In this guide, we’ll walk you through every step, from gathering ingredients to adding that magical finishing touch. Whether you’re a seasoned baker or a newbie, this recipe will inspire you to create a dessert that’s as beautiful as it is delicious. Let’s dive in!
JUMP TO
Why You’ll Love This Heart-Shaped Cake
Perfect for Special Occasions
What’s more romantic than a cake shaped like a heart? It’s ideal for Valentine’s Day, birthdays, anniversaries, or even as a surprise dessert for someone special. With its charming design and delectable taste, this cake is sure to make every moment unforgettable.
Easy to Customize
Whether you’re a fan of classic chocolate flavors or prefer a light vanilla sponge, this cake is incredibly versatile. Add fresh strawberries, creamy frosting, or go bold with fondant designs. It’s your canvas to create a masterpiece that matches your style.
Loved by All Ages
Kids adore the playful shape, while adults appreciate the effort and thoughtfulness behind it. Seriously, who wouldn’t smile at a heart-shaped dessert?
Ingredients for a Heart-Shaped Cake
To bake a delightful heart-shaped cake, gather these simple ingredients. They’re pantry staples that are easy to find and perfect for creating a moist and flavorful dessert.
Dry Ingredients
- 2 ½ cups all-purpose flour
- 1 ¾ cups granulated sugar
- ¾ cup unsweetened cocoa powder (for a chocolate heart-shaped cake)
- 2 teaspoons baking powder
- ½ teaspoon baking soda
- ½ teaspoon salt
Wet Ingredients
- 1 cup whole milk (or your favorite plant-based milk for a dairy-free option)
- ½ cup unsalted butter, softened
- 2 large eggs
- 2 teaspoons vanilla extract
- ¾ cup boiling water (to enhance cocoa flavor, optional for chocolate cakes)
Optional Add-Ons for a Twist
- ½ cup chocolate chips for a richer flavor
- Fresh strawberries or raspberries for garnishing
- Food coloring if you want a vibrant red or pink cake
These ingredients are versatile, allowing you to customize the cake’s flavor and texture.
How to Make a Heart-Shaped Cake
Tools You’ll Need
Before you begin, make sure you have the following tools on hand for a smooth baking process:
- A heart-shaped cake pan (or a round and square pan for a DIY method)
- Mixing bowls
- Whisk or electric mixer
- Spatula
- Cooling rack
Preparing the Batter
- Preheat the oven to 350°F (175°C). Grease your heart-shaped pan with butter and lightly dust it with flour to prevent sticking.
- In a large bowl, sift together the dry ingredients: flour, sugar, cocoa powder (if using), baking powder, baking soda, and salt. Mix until well combined.
- In another bowl, whisk the wet ingredients: milk, butter, eggs, and vanilla extract. Slowly add the wet mixture to the dry ingredients, stirring until just combined.
- If you’re making a chocolate cake, pour in the boiling water gradually. The batter will be thin, but don’t worry—it bakes up perfectly moist.
Baking the Cake
- Pour the batter evenly into the heart-shaped pan. Gently tap the pan on the counter to remove air bubbles.
- Bake for 30-35 minutes, or until a toothpick inserted in the center comes out clean.
- Remove the cake from the oven and let it cool in the pan for 10 minutes before transferring it to a cooling rack.
Shaping the Cake Without a Heart-Shaped Pan
Don’t have a heart-shaped pan? No problem! Here’s a clever trick:
- Use a square pan and a round pan of the same size. Once baked, cut the round cake in half.
- Place the square cake as the base and align the two semicircles on adjacent sides to form a heart. Secure with a bit of frosting to hold the pieces together.
Cooling and Layering
Allow the cake to cool completely before layering or decorating. A warm cake can cause frosting to melt, so patience is key!
Decorating Your Heart-Shaped Cake
Decorating a heart-shaped cake is where the magic happens! It’s your chance to make your dessert not only delicious but also a visual delight.
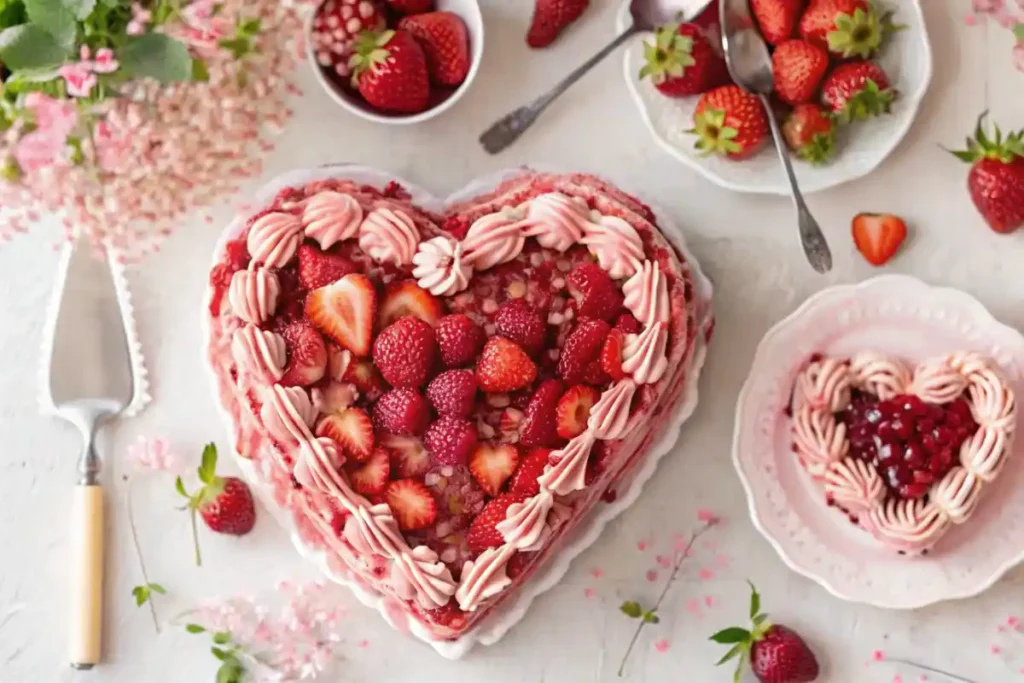
Simple Buttercream Design
A classic buttercream frosting works wonders for a smooth and elegant finish.
- Whip unsalted butter with powdered sugar, a splash of vanilla extract, and a few drops of milk until creamy.
- Spread an even layer of frosting over the cake using an offset spatula.
- Add piped rosettes or swirls along the edges for a decorative touch.
Fondant for a Professional Finish
For a polished, bakery-style look, roll out fondant to cover your cake.
- Dust your work surface with powdered sugar and roll the fondant thinly.
- Carefully drape it over the cake and smooth it out using your hands or a fondant smoother.
- Trim the edges neatly and add fondant shapes like hearts or flowers for embellishment.
Chocolate Ganache and Fresh Fruit Toppings
A glossy chocolate ganache paired with fresh fruit adds a sophisticated touch.
- Heat heavy cream until just simmering, then pour it over chopped chocolate. Stir until silky smooth.
- Drizzle the ganache over the cake, letting it cascade down the sides for a dripping effect.
- Decorate with strawberries, raspberries, or edible flowers for a pop of color.
Themed Decorations for Different Occasions
- Valentine’s Day: Add pink and red sprinkles, candy hearts, or a “Be Mine” message.
- Anniversaries: Pipe a heartfelt message or initials with frosting.
- Birthdays: Use candles, edible glitter, or playful toppers to make it festive.
Tips for the Perfect Heart-Shaped Cake
Avoiding Common Mistakes
Making a heart-shaped cake can feel intimidating, but these tips will ensure a smooth baking experience:
- Don’t Overmix: Overmixing the batter can lead to a dense cake. Mix just until combined for a fluffy texture.
- Check Your Oven Temperature: Use an oven thermometer to avoid uneven baking. A slightly incorrect temperature can affect the cake’s texture.
- Grease the Pan Well: Pay extra attention to the corners of the heart-shaped pan to prevent sticking.
Achieving the Perfect Texture
For a soft and moist cake:
- Measure ingredients accurately. Too much flour can make the cake dry, while too little can make it crumbly.
- Incorporate room-temperature ingredients. They blend better, ensuring a smooth batter.
Ensuring an Even Bake
To avoid a domed center:
- Bake the cake at a slightly lower temperature, around 325°F (165°C).
- Wrap the outside of the pan with cake strips (or a damp towel) to keep the edges and center baking evenly.
Healthier Versions of Heart-Shaped Cake
Low-Sugar and Low-Fat Alternatives
You don’t have to sacrifice flavor to make a healthier heart-shaped cake. Try these swaps for a lighter treat:
- Replace half the sugar with unsweetened applesauce or mashed bananas to reduce sweetness while keeping moisture.
- Use Greek yogurt instead of butter for a creamy, tangy alternative.
- Opt for whole wheat flour or almond flour to boost fiber content.
Vegan and Gluten-Free Options
If you’re catering to dietary preferences or allergies, here are some simple adjustments:
- Use gluten-free all-purpose flour for a celiac-friendly cake.
- Replace eggs with flaxseed eggs (1 tablespoon ground flaxseed + 3 tablespoons water per egg).
- Substitute dairy milk with almond, oat, or coconut milk for a vegan-friendly batter.
Delicious Add-Ons for a Healthy Boost
- Incorporate fresh fruits like raspberries, strawberries, or blueberries into the batter for natural sweetness and added nutrients.
- Top the cake with a dollop of coconut whipped cream instead of heavy frosting.

How to Store and Freeze a Heart-Shaped Cake
Best Ways to Store Leftovers
Proper storage is key to keeping your heart-shaped cake fresh and delicious for days:
- At Room Temperature: If unfrosted, wrap the cake tightly in plastic wrap or store it in an airtight container. It will stay fresh for up to 2 days.
- In the Refrigerator: For frosted cakes, place the cake in a cake box or cover it loosely with plastic wrap to protect the decorations. It can last for 4-5 days in the fridge.
Freezing Instructions
If you’re planning ahead or want to save leftovers for later, freezing is a fantastic option:
- For the Cake Layers: Allow the layers to cool completely, then wrap each one in plastic wrap and place them in a freezer-safe bag. They can be frozen for up to 3 months.
- For a Decorated Cake: Chill the frosted cake in the fridge until the frosting hardens, then wrap it in plastic wrap and aluminum foil. Place it in the freezer for up to 1 month.
- Thawing Tips: Transfer the cake to the refrigerator overnight to thaw slowly. Bring it to room temperature before serving for the best taste and texture.
With these tips, you’ll never waste a crumb of your lovingly baked cake! If you love easy, freezer-friendly recipes, check out our 3-Ingredient No-Bake Cheesecake—a perfect dessert to make ahead of time.
Heart-Shaped Cake for Every Occasion
Valentine’s Day
A heart-shaped cake is practically synonymous with Valentine’s Day! Make it extra special by:
- Using a red velvet or strawberry-flavored base for a romantic color.
- Adding themed decorations like edible glitter, heart-shaped candies, or a “Be Mine” piped message in frosting.
- Pairing it with fresh flowers or chocolate-dipped strawberries for an elegant presentation.
Anniversaries and Weddings
Celebrate love with a cake that speaks volumes!
- Opt for a sophisticated design with smooth fondant and gold or silver accents.
- Add initials, a meaningful date, or a short romantic phrase in piped icing.
- Use flavors like vanilla-almond or chocolate ganache for an indulgent yet elegant touch.
Birthdays and Baby Showers
Bring fun and creativity to the party with personalized designs.
- For kids’ birthdays, decorate the cake with bright colors, sprinkles, or cartoon-themed toppers.
- For baby showers, use pastel shades and edible decorations like baby booties or rattles.
Casual Celebrations
Even on a regular day, a heart-shaped cake is a delightful way to show you care. Keep it simple:
- Use whipped cream frosting for a light and airy treat.
- Garnish with seasonal fruits like peaches or cherries for a fresh and vibrant dessert.
Conclusion: Wrapping It Up
A heart-shaped cake is more than just a dessert—it’s a heartfelt expression of love, creativity, and care. Whether you’re making it for Valentine’s Day, an anniversary, a birthday, or just to surprise someone special, this cake is bound to leave a lasting impression. With easy-to-follow steps, versatile decoration ideas, and options for healthier or themed variations, you have everything you need to make your baking experience a success.
So, roll up your sleeves, preheat that oven, and let your creativity flow! Don’t forget to explore more delightful recipes like our Irresistible Brookie Recipe or Lemon Blueberry Cookies for additional inspiration.
Happy baking, and may your heart-shaped cake bring smiles and sweetness to your loved ones! If you try this recipe, feel free to share your experience or leave a comment—we’d love to hear from you!
FAQs About Heart-Shaped Cake
How to make a heart-shaped cake without a heart-shaped pan?
Don’t have a heart-shaped pan? No worries! Here’s an easy solution:
1- Bake one square cake and one round cake of the same size.
2- Cut the round cake in half to form two semicircles.
3- Place the square cake so it resembles a diamond, then position the two semicircles on adjacent sides of the top corner.
4- Use a bit of frosting to “glue” the pieces together, creating a heart shape. Frost and decorate as desired for a seamless look.
How much does a 6-inch heart cake serve?
A 6-inch heart-shaped cake typically serves 6-8 people, depending on portion size. If you’re cutting for smaller slices or pairing it with other desserts, you could stretch it to about 10 servings. For a larger gathering, consider scaling up the recipe or baking multiple layers.
How much cake batter do I need for a heart-shaped pan?
The amount of batter needed depends on the size and depth of your heart-shaped pan:
– For a standard 8-inch heart-shaped pan: You’ll need about 4-5 cups of batter.
– For a smaller 6-inch heart-shaped pan: About 2-3 cups of batter should be enough.
To avoid overfilling, always leave about an inch of space from the top of the pan for the batter to rise during baking.
Latest Recipes to Inspire Your Next Meal
