Who doesn’t love the sound of a crispy crunch when biting into perfectly breaded chicken? Panko breaded chicken is the ultimate comfort food, blending irresistible texture with endless versatility. Whether you’re planning a family dinner or whipping up a quick snack, this recipe will have everyone coming back for seconds (or thirds!). Let’s dive into why this dish deserves a spot in your recipe repertoire.
JUMP TO
- Why You’ll Love Panko Breaded Chicken
- The Health Benefits of Panko Breaded Chicken
- What You’ll Need: A Detailed List of Ingredients
- How to Make Panko Breaded Chicken
- Tips for Perfect Panko Breaded Chicken Every Time
- Freezing and Reheating Panko Breaded Chicken
- Serving Suggestions: What Goes Best with Panko Breaded Chicken?
- Conclusion: Why Panko Breaded Chicken is a Must-Try
- FAQs: Answering Your Panko Breaded Chicken Questions
- Latest Recipes to Inspire Your Next Meal
Why You’ll Love Panko Breaded Chicken
What Makes Panko Special?
Panko breadcrumbs are the secret weapon behind that addictive crunch! These Japanese-style breadcrumbs are lighter, crispier, and flakier than traditional ones, making them perfect for creating golden, crunchy coatings. Unlike regular breadcrumbs, panko absorbs less oil, giving your chicken a satisfyingly crispy exterior without feeling heavy or greasy.
Versatility in Meals
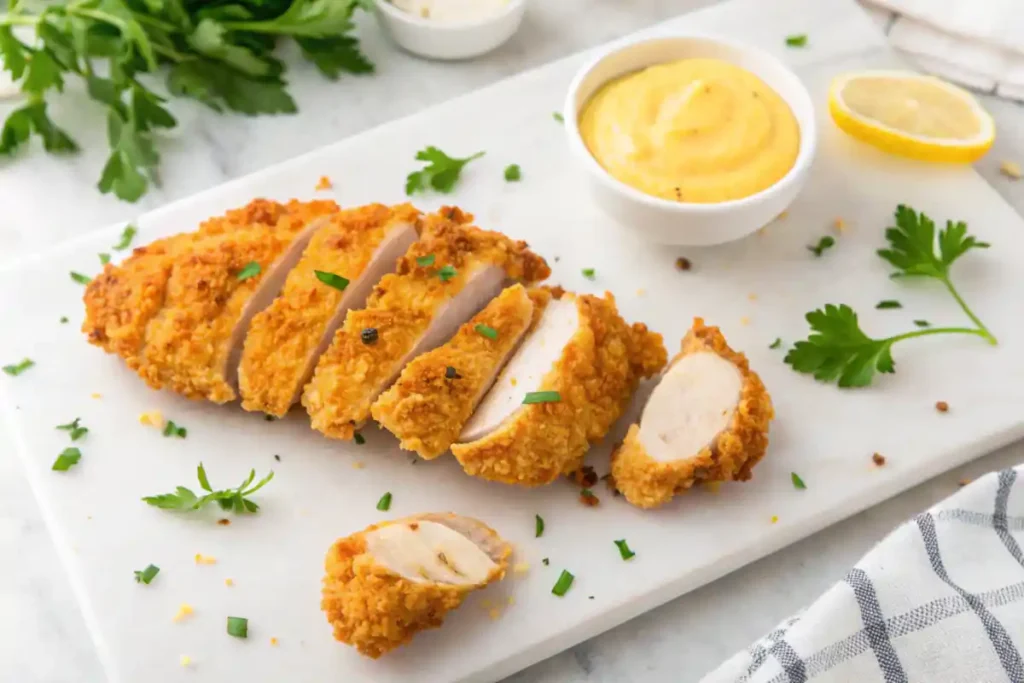
Oh, the possibilities! Panko breaded chicken isn’t just for dinner—it’s your all-star in various dishes. Want a quick snack? Turn them into bite-sized nuggets. Hosting a game night? Serve them as crispy tenders with an array of dipping sauces. And don’t forget panko crusted chicken sandwiches—layered with fresh greens and your favorite condiments, they’re out-of-this-world delicious!
The Health Benefits of Panko Breaded Chicken
You might think panko breaded chicken is all about indulgence, but guess what? It can actually be a healthier choice compared to other breaded options! Let’s talk about why this dish can satisfy both your cravings and your health goals.
Lighter and Less Greasy
One of the standout features of panko breadcrumbs is that they absorb less oil during cooking. Whether you bake, air-fry, or pan-fry, you’ll enjoy a crispy coating without the heavy, greasy feel. This makes panko chicken a great alternative to traditional fried chicken for those watching their calorie intake.
Protein-Packed Goodness
Chicken itself is a fantastic source of lean protein, essential for muscle repair and overall health. Pair it with the light crunch of panko breadcrumbs, and you’ve got a meal that’s as nutritious as it is satisfying.
Baked or Air-Fried Options
If you choose to bake or air-fry your panko breaded chicken, you’re skipping the need for excess oil entirely. This lowers the fat content while still delivering that crispy, golden perfection. It’s a win-win!
No-Nonsense Ingredients
Homemade panko breaded chicken lets you take control of what goes into your dish. You can skip additives or preservatives and customize the breading with nutritious add-ins like herbs or parmesan cheese for added flavor without guilt.
Now that you know how panko chicken fits into a healthy lifestyle, let’s get into the nitty-gritty—what you’ll need to make this delicious dish come to life! You’ll see how simple it is to create a wholesome, crowd-pleasing meal that everyone will love.
What You’ll Need: A Detailed List of Ingredients
Before we roll up our sleeves and dive into making panko breaded chicken, let’s get all the ingredients ready. Having everything prepared not only makes the process smoother but also ensures your chicken comes out as crispy and flavorful as possible.
Core Ingredients
These are the essentials that you simply can’t skip.
- Chicken: 2 large chicken breasts or 4-6 thighs, depending on your preference. Slice them into even cutlets or tenders for faster, even cooking.
- Panko breadcrumbs: 1 ½ cups. Look for plain panko so you can season it yourself for maximum flavor.
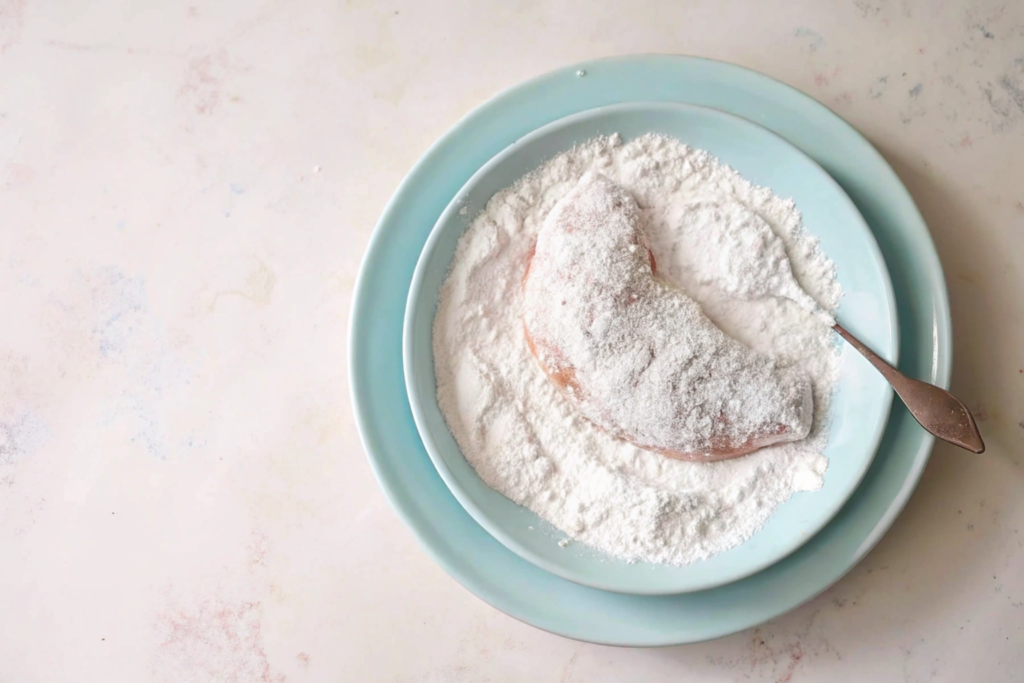
- All-purpose flour: ½ cup, for the first step in breading.
- Eggs: 2 large eggs, beaten, to help the panko stick perfectly.
- Salt and pepper: 1 teaspoon each, to season every layer.
- Garlic powder: 1 teaspoon, for a hint of savory depth.
- Paprika: 1 teaspoon, to add a subtle smokiness.
Optional Additions for Extra Flavor
Take your panko breaded chicken to the next level with these optional but highly recommended ingredients:
- Parmesan cheese: ¼ cup finely grated. Mix it into the panko for a cheesy twist.
- Dried parsley or thyme: 1 teaspoon, for a hint of freshness.
- Lemon zest: ½ teaspoon, to brighten the flavors.
Cooking Oil or Spray
For pan-frying, you’ll need about ¼ cup of a neutral oil like canola or avocado oil. If you’re baking or air-frying, a light mist of cooking spray works wonders for achieving that golden crispiness.
With your ingredients prepped, you’re ready to create a masterpiece. Don’t forget that proper organization—like setting up a breading station—is key to making this process enjoyable and mess-free.
How to Make Panko Breaded Chicken
Alright, it’s time to turn those ingredients into crunchy, golden perfection! Whether you’re a seasoned cook or a beginner, this recipe is foolproof. Let’s break it down into easy-to-follow steps.
Prepping Your Ingredients
- Tenderize the Chicken:
Place your chicken breasts between two sheets of parchment paper and gently pound them with a meat mallet until they are about ½ inch thick. This ensures even cooking and juicy results. - Set Up Your Breading Station:
Create a simple assembly line with three shallow bowls:- Bowl 1: Add the flour, seasoned with a pinch of salt and pepper.
- Bowl 2: Beat the eggs and mix in a tablespoon of water for a smoother coating.
- Bowl 3: Combine panko breadcrumbs, garlic powder, paprika, and any optional add-ins like parmesan cheese or parsley.
Coating the Chicken
- Dust in Flour:
Lightly coat each chicken piece in the seasoned flour, shaking off any excess. This helps the egg stick better. - Dip in Egg:
Submerge the floured chicken in the beaten egg mixture, ensuring it’s fully coated. - Cover with Panko:
Press the chicken into the panko breadcrumb mixture, ensuring an even layer on both sides. Gently pat to make the coating stick.
Cooking Methods
- Oven-Baked Method
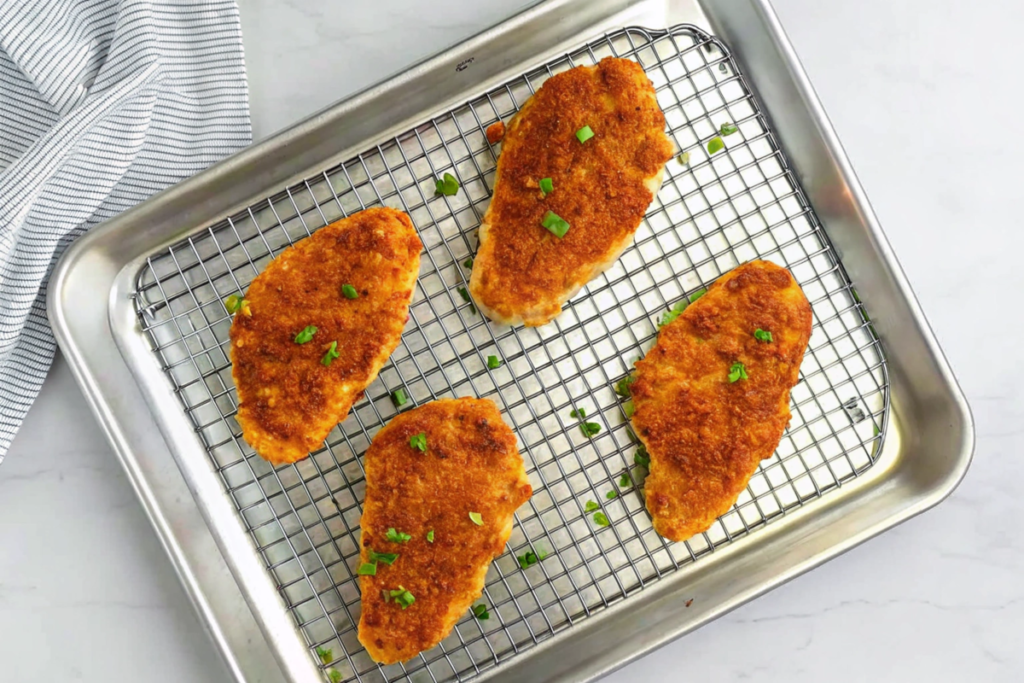
- Preheat your oven to 400°F (200°C) and line a baking sheet with parchment paper.
- Place the breaded chicken on the baking sheet and lightly spray the tops with cooking spray.
- Bake for 20-25 minutes, flipping halfway through, until the chicken reaches an internal temperature of 165°F (74°C).
- Air-Fried Method
- Preheat your air fryer to 375°F (190°C).
- Arrange the chicken pieces in a single layer in the air fryer basket.
- Cook for 12-15 minutes, flipping once, until crispy and golden.
- Pan-Fried Method
- Heat 2-3 tablespoons of oil in a large skillet over medium heat.
- Add the chicken and cook for 3-4 minutes per side, until golden brown and fully cooked through.
- Transfer to a paper towel-lined plate to drain excess oil.
And there you have it—perfectly panko breaded chicken every time! Each method delivers that satisfying crunch, so choose the one that suits your style or available tools.
Tips for Perfect Panko Breaded Chicken Every Time
You’re almost there! To make your panko breaded chicken truly irresistible, these expert tips will ensure you achieve that perfect crunch, flavor, and golden finish every single time.
How to Keep It Extra Crispy
- Use Cold Eggs:
Believe it or not, cold eggs help the breading adhere better to the chicken. This simple trick makes a world of difference in achieving that flawless coating. - Don’t Skip the Pat:
After coating the chicken in panko breadcrumbs, gently press the crumbs into the chicken with your hands. This ensures they stick firmly and don’t fall off during cooking. - Avoid Overcrowding:
Whether you’re baking, frying, or air-frying, make sure the chicken pieces aren’t touching. Overcrowding traps steam, leading to soggy breading instead of crispy perfection.
Seasoning Tips for Maximum Flavor
- Layer Your Seasoning:
Don’t rely on the breadcrumbs alone for flavor! Season every layer—flour, egg wash, and panko mixture—with spices like garlic powder, paprika, or even lemon zest. - Add Cheese for Depth:
Mixing finely grated parmesan cheese into the panko breadcrumbs not only adds richness but also helps the breading brown beautifully. - Customize with Herbs:
Toss in dried parsley, thyme, or even a pinch of cayenne pepper for a subtle flavor boost.
Avoiding Common Mistakes
- Prevent Soggy Breading:
To avoid sogginess, pat the chicken dry with paper towels before breading. Any moisture will interfere with the crisping process. - Choose the Right Oil:
If frying, use a neutral oil with a high smoke point, like canola or avocado oil, to maintain a clean, even cook. - Test for Doneness:
Always check that your chicken reaches an internal temperature of 165°F (74°C) to ensure it’s safe to eat and perfectly cooked.
Follow these tips, and your panko breaded chicken will be nothing short of legendary.
Freezing and Reheating Panko Breaded Chicken
Who doesn’t love leftovers that taste as good as the original? With the right techniques, you can freeze and reheat panko breaded chicken while keeping it crispy and flavorful. Let’s dive into the best methods to store your chicken for future meals.
How to Freeze for Later
- Prepare Your Chicken:
Allow the cooked chicken to cool completely before freezing. Placing warm chicken in the freezer can cause condensation, leading to soggy breading. - Flash Freeze:
Arrange the chicken pieces in a single layer on a baking sheet lined with parchment paper. Place the sheet in the freezer for 1-2 hours, or until the chicken is frozen solid. - Store Properly:
Transfer the frozen chicken to an airtight container or freezer-safe bag. Be sure to label it with the date for easy tracking. Frozen panko chicken can stay fresh for up to 3 months.
Reheating for Crispy Perfection
- In the Oven:
- Preheat your oven to 375°F (190°C).
- Place the frozen chicken on a wire rack over a baking sheet.
- Bake for 15-20 minutes, or until heated through and crispy.
- In the Air Fryer:
- Preheat your air fryer to 350°F (175°C).
- Place the chicken pieces in the basket in a single layer.
- Heat for 8-10 minutes, flipping halfway through, until warm and crunchy.
- Avoid the Microwave:
While convenient, microwaving will make the breading soggy and ruin the crunch factor. Stick to the oven or air fryer for the best results.
Serving Suggestions: What Goes Best with Panko Breaded Chicken?
Your panko breaded chicken is crispy, golden, and irresistible—but what takes it to the next level is pairing it with the right sides and sauces. Whether you’re preparing a family dinner, a party platter, or a simple lunch, these serving ideas will elevate your dish.
Dipping Sauces to Complement the Crunch
- Honey Mustard:
A classic choice with the perfect balance of sweet and tangy flavors. - Garlic Aioli:
Creamy and rich, this dip adds a luxurious touch to every bite. - Sweet Chili Sauce:
For those who enjoy a bit of heat with a hint of sweetness. - Homemade Ranch:
Cool and herby, ranch dressing is always a crowd-pleaser.
Perfect Side Dishes
- Roasted Vegetables:
Serve your chicken with a side of roasted buttercup squash, carrots, zucchini, or asparagus for a balanced meal. - Mashed Potatoes:
Creamy, buttery mashed potatoes make an excellent partner to the crunchy chicken. - Garden Salad:
A light, refreshing salad with greens, cherry tomatoes, and a lemon vinaigrette pairs beautifully with the richness of panko breaded chicken. - Coleslaw:
Add a tangy, crunchy contrast to your meal with a classic coleslaw.
Creative Serving Ideas
- Chicken Sandwich:
Layer your crispy chicken on a toasted bun with lettuce, tomato, and your favorite sauce for an irresistible sandwich. - Chicken Tenders Platter:
Serve bite-sized pieces with a trio of dips for an appetizer that’s perfect for sharing. - Chicken and Waffles:
Pair your panko chicken with fluffy waffles and drizzle with honey for a fun, sweet-savory twist.
With these pairing ideas, your panko breaded chicken becomes a versatile star of the table, fitting seamlessly into any meal or occasion.
Conclusion: Why Panko Breaded Chicken is a Must-Try
There’s something magical about the satisfying crunch of panko breaded chicken. It’s a dish that combines simplicity with a touch of elegance, making it perfect for weeknight dinners, family gatherings, or even special occasions.
From its healthier preparation options to its unbeatable versatility, this recipe allows you to get creative while staying true to its core appeal—crispy, golden perfection. Plus, with the tips and techniques shared here, you’re well-equipped to avoid common pitfalls and make every batch a success.
With your newfound skills, your panko breaded chicken will surely become a household favorite that everyone looks forward to. Enjoy the crunch, the flavor, and the joy of making a meal worth savoring!
FAQs: Answering Your Panko Breaded Chicken Questions
How Do You Get Panko to Stick to Chicken?
To make panko breadcrumbs stick, follow the classic three-step breading process:
– Start with Flour: Dredging the chicken in flour creates a dry surface for the egg to adhere to.
– Dip in Egg: The beaten egg acts as a glue that helps the panko breadcrumbs stick firmly.
– Press with Panko: Gently press the chicken into the panko mixture, ensuring even coverage on both sides.
Pro Tip: Pat the chicken dry with paper towels before starting the breading process for the best results.
Do You Put Flour or Egg First in Panko?
Always start with flour first, followed by egg, and finish with panko breadcrumbs. This sequence ensures that each layer clings properly to the chicken. Skipping the flour step can result in uneven breading or breadcrumbs falling off during cooking.
Is Panko Fried Chicken Healthy?
It can be! While traditional frying adds oil and calories, using panko breadcrumbs is a lighter option compared to regular breadcrumbs, as they absorb less oil. To make your panko breaded chicken even healthier, try baking or air-frying instead of pan-frying. These methods reduce fat content while still delivering that crispy, golden perfection.
Why Do You Put Flour Before Panko?
Flour acts as the essential first layer in the breading process. It creates a dry, rough surface that helps the egg stick to the chicken. Without this step, the egg would slide off, and the panko wouldn’t adhere properly. The result? A messy, uneven breading that won’t deliver the crunch you’re craving.
